I recently found a piece of software that I am exploring to help me manage our current IT environment. To install this I require two applications setup. A PHP web server and a MySQL database.
Following below is an example of how to:
Install MySQL on a Windows 2019 Server.
Prerequisite
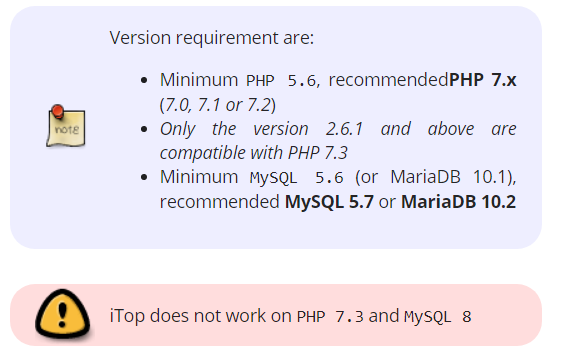
Before choosing a version of MySQL to use make sure that the software you are intending to use supports the current version. Alternatively, download the correct version. As an Example ITOP does not Support certain versions:
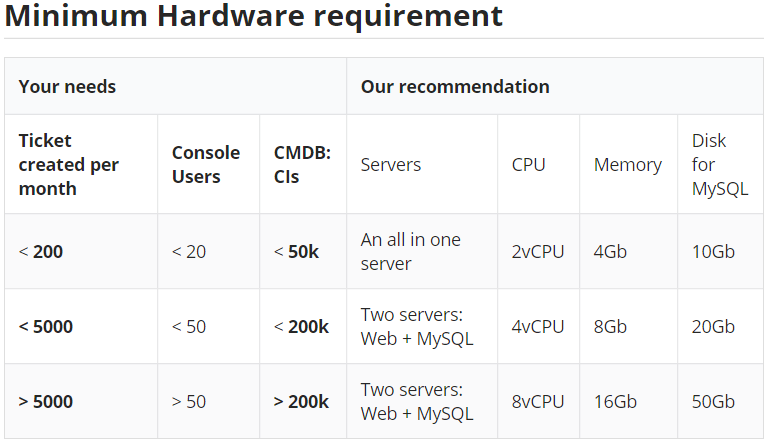
Secondly, check the recommended hardware requirements. Again using ITOP as an example depending on what you intend to do there are minimum hardware requirements. My suggestion would be is to make sure you have this available over the current application running on the server:
The Download link for MySQL is HERE
Installing
For the installation, we are going to use Version 8 as this will be used later to set up a New WordPress site.
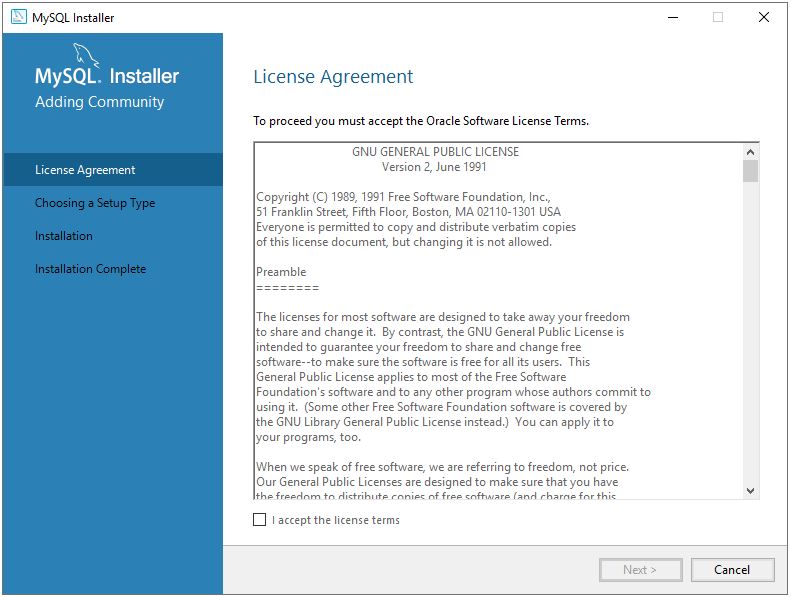
On the Installation Start, there are the default License Agreements that has to be accepted.
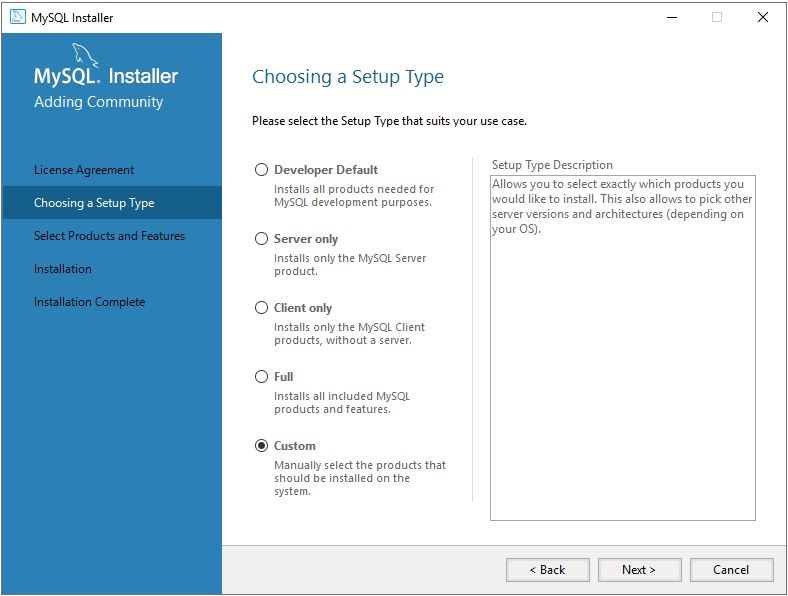
Next, we choose custom as we don’t require all the features
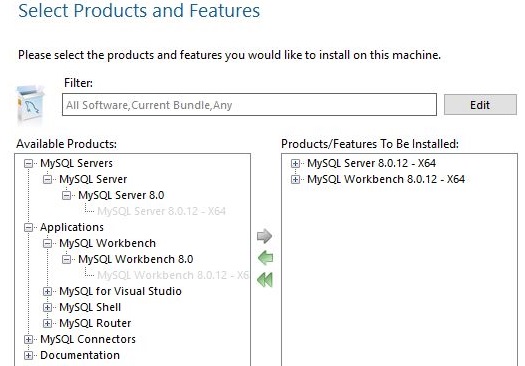
Everything on the right will be install, you can choose:
MySQL Server
MySQL Workbench
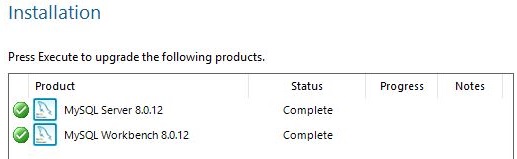
Once done choose install and wait for the progress to complete
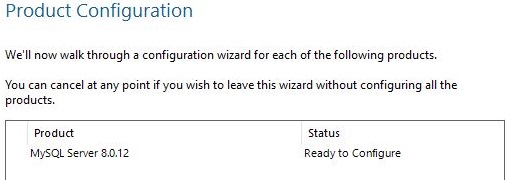
MySQL will then start configuring the Server
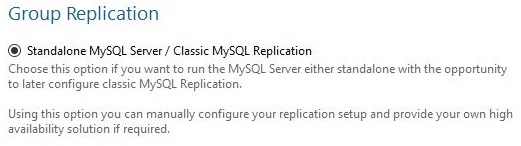
Choose Stand Alone we won’t be working with the advanced sections.
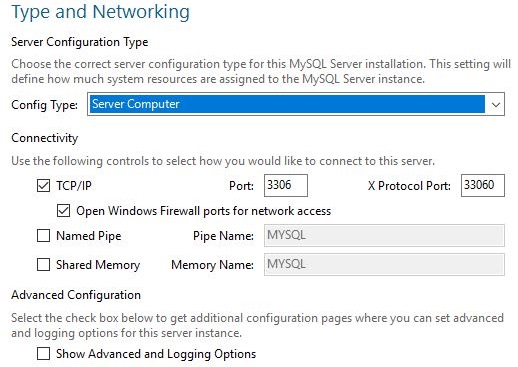
For the Type and Networking, you can leave as-is unless you have different security restrictions setup
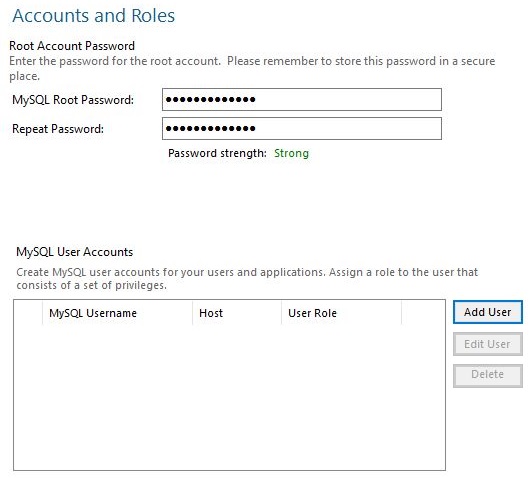
When it comes to passwords I always recommend a Strong password.
Using something like LastPass to generate and Store Passwords

Enter your incredibly hard password that nobody can ever guess.
Leave the Additional MySQL User Accounts blank as we will create the users in the Workbench.
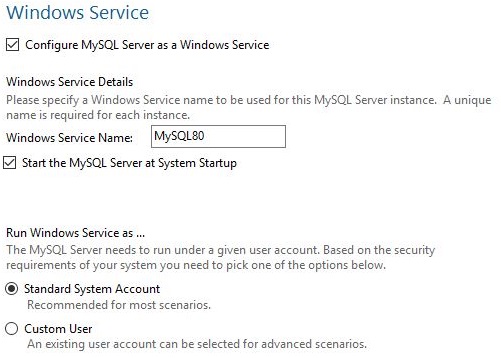
Leave the service page as default and go next
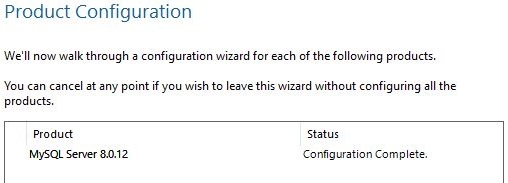
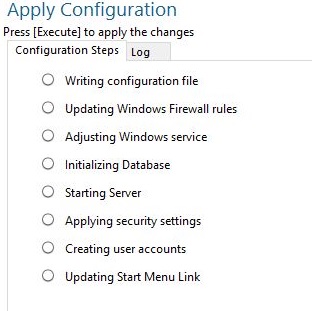
Once you execute the software will configure the system as per configs chose.
All configs will be confirmed once on the completion page.