
Setting up archive and deletion policies for Office 365 mailboxes is crucial for efficient mailbox management. The guide outlines creating and applying retention policies using the Microsoft Purview Portal and the new Exchange Admin Center. Here’s a summary of the steps:
1. Enable Archive Mailboxes for Users:
Go to the Exchange Admin Center.
- Navigate to Recipients > Mailboxes.
- Choose the user(s) you want to enable the archive mailbox for.
- In the pop-up pane, go to Others, then select Manage Mailbox Archive under Mailbox Archive.
- Turn on the Mailbox archive, then Save.
2. Create Retention Tags for Policies:
For Archive Policy Tag:
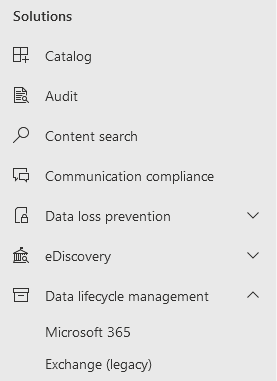
Access the Microsoft Purview compliance portal.
- Select Solutions > Data lifecycle management > Exchange (legacy) > MRM Retention tags.
- Click + New tag, name the tag, and add a description.
- Define how the tag will be applied:
- Choose Automatically to the entire mailbox (default).
- Set the retention period in days.
- Retention action: Move items to the archive.
- Review and Submit.
For Deletion Policy Tag:
Follow the same steps as above.
- Choose Automatically to default folder and select Deleted items.
- Set the retention period for deletion.
- Retention action: Delete and allow recovery.
- Review and Submit.
3. Create a New Retention Policy:
Access the Microsoft Purview compliance portal.
- Go to Data lifecycle management > Exchange (legacy) > MRM Retention policies.
- Select New policy.
- Type the new retention policy name.
- Select + Add tag, add both retention tags, then click Add.
- Review and Submit.
4. Replace Default Policy with New Retention Policy:
Use the new Exchange Admin Center.
- Go to Recipients > Mailboxes.
- Select all mailboxes.
- Click Mailbox policies and, under Retention Policy, choose the newly created retention policy.
- Select Save.
- Verify the change by checking a mailbox’s Retention policy on the Mailbox properties page.
By following these steps, you can automate the management of your Office 365 mailboxes efficiently. Additionally, it’s suggested to consider third-party solutions for automating mailbox management to ensure optimal storage with minimal effort.